Dental X-ray positioning is crucial for accurate radiographic imaging, ensuring clear results for proper diagnosis․ Proper techniques minimize errors and radiation exposure, essential for patient safety and effective treatment planning․
1․1 Importance of Proper Positioning in Dental Radiography
Proper positioning in dental radiography ensures accurate representation of dental structures, minimizing retakes and radiation exposure․ It enhances image clarity, allowing precise diagnosis and treatment planning․ Correct alignment of the X-ray beam and sensor is vital for capturing detailed anatomical information, making it a cornerstone of effective dental care and patient safety․
1․2 Overview of Dental X-Ray Techniques
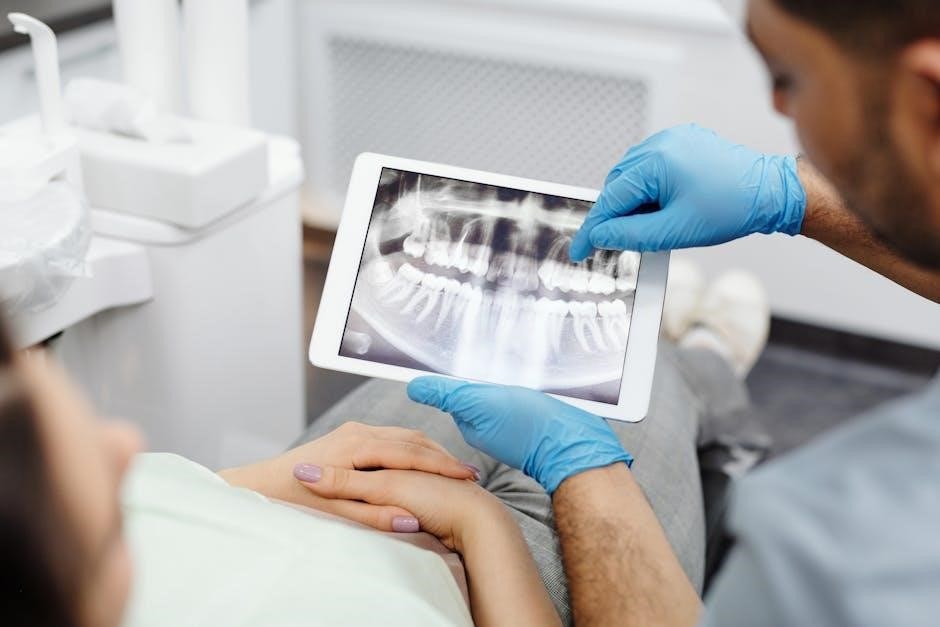
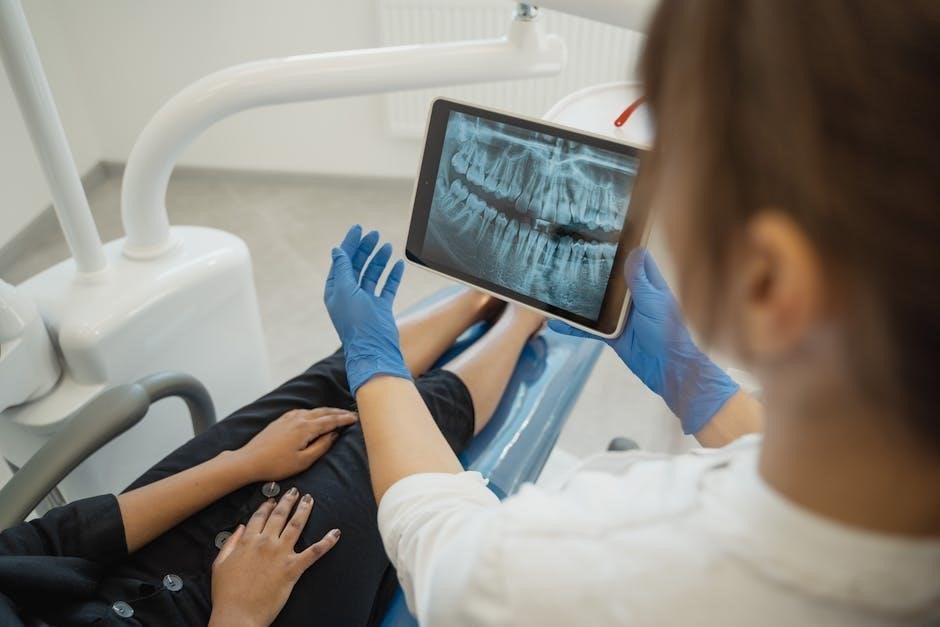
Dental X-ray techniques include intraoral and extraoral methods, each serving specific diagnostic purposes․ Intraoral X-rays capture detailed images of individual teeth and surrounding structures, while extraoral X-rays provide broader views of the jaw and skull․ Techniques like panoramic and cephalometric X-rays are used for comprehensive assessments, ensuring accurate diagnoses and effective treatment planning in various dental care scenarios․
Types of Dental X-Rays
Dental X-rays are categorized into intraoral and extraoral types․ Intraoral X-rays capture images inside the mouth, while extraoral X-rays are taken outside the mouth for broader views․
2․1 Intraoral X-Rays
Intraoral X-rays are taken inside the mouth, providing detailed images of individual teeth and surrounding bone․ They are essential for diagnosing cavities, fractures, and periodontal disease․ Common types include periapical X-rays (showing the entire tooth) and bitewing X-rays (capturing the upper and lower teeth biting down)․ Proper positioning of the sensor and X-ray beam ensures accurate results, minimizing retakes and radiation exposure․
2․2 Extraoral X-Rays
Extraoral X-rays are taken outside the mouth, capturing larger areas like the jaw, skull, or entire dental structure․ Common types include panoramic X-rays (showing a wide view of the upper and lower jaw) and cephalometric X-rays (used for orthodontic planning)․ These X-rays are ideal for diagnosing TMJ disorders, fractures, or impacted teeth and provide a broader perspective than intraoral X-rays, aiding in comprehensive treatment planning․
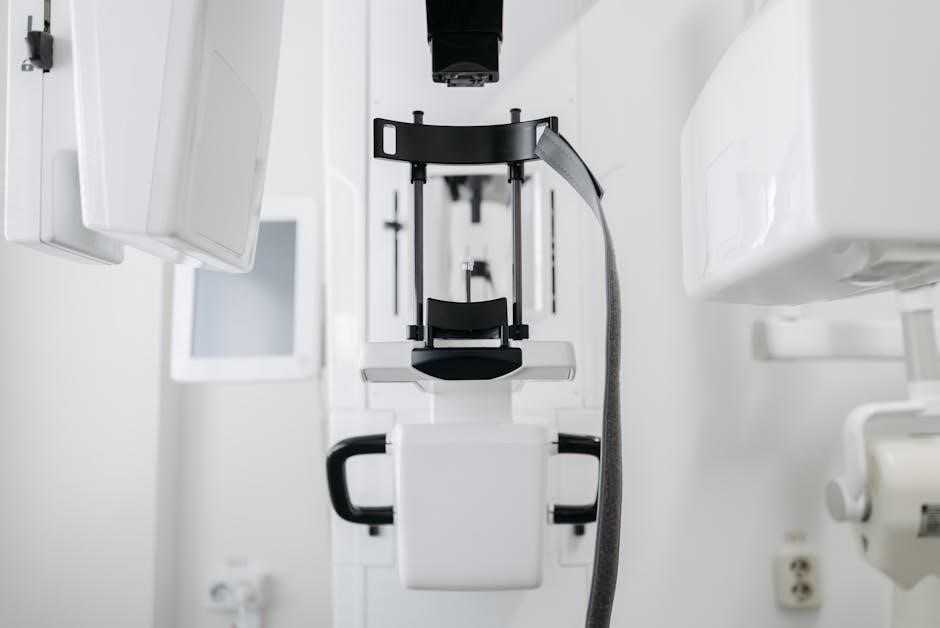
Essential Equipment for Dental X-Ray Positioning
Key tools include the iM3 X-Ray Positioning Kit, bite blocks, positioning rings, and sensors․ These ensure accurate alignment, minimizing retakes and enhancing image quality for precise diagnostics․
3․1 The iM3 Complete X-Ray Positioning Kit
The iM3 Complete X-Ray Positioning Kit is a comprehensive tool designed to simplify dental radiography․ It includes bite blocks, positioning guides, and alignment tools to ensure precise X-ray placement․ These components help reduce retakes and minimize radiation exposure, enhancing both accuracy and patient safety;
By streamlining the positioning process, the kit improves workflow efficiency and ensures consistent, high-quality radiographs․ Its innovative design supports both intraoral and extraoral techniques, making it a versatile solution for modern dental practices․
3․2 Other Tools and Accessories
Beyond the iM3 kit, essential tools include bite blocks, positioning guides, and alignment aids․ These accessories ensure accurate X-ray placement, reducing retakes and enhancing image clarity․ They also improve patient comfort and maintain proper hygiene standards, making them indispensable for efficient and precise dental radiography․ Together, they complement the kit, ensuring optimal results in various clinical scenarios․
Step-by-Step Guide to Intraoral X-Ray Positioning
This guide outlines the process for intraoral X-rays, focusing on correct patient positioning, sensor placement, and precise alignment of the X-ray beam for optimal imaging results․
4․1 Positioning the Patient
Proper patient positioning is critical for accurate intraoral X-ray imaging․ The patient should sit upright with head straight, chin slightly elevated, and mouth closed․ For posterior teeth, the patient’s cheek may need retraction․ Ensure the X-ray beam is perpendicular to the dental film or sensor, aligning with the long axis of the tooth․ Use a positioning guide or stabilizing tools like bite blocks for consistency and accuracy․
- Adjust headrest for comfort and alignment․
- Guide the patient to hold still during exposure․
4․2 Placing the X-Ray Sensor
Correct placement of the X-ray sensor ensures optimal image quality․ Position the sensor in the patient’s mouth, aligning it parallel to the dental arch․ Avoid rotation or tilting․ For posterior teeth, place the sensor against the lingual/palatal wall․ Use a positioning guide to stabilize the sensor․ Ensure the aiming device aligns with the sensor’s center, maintaining proper angulation for accurate imaging․
- Use a positioning guide for stability․
- Align the sensor with the tooth’s long axis․
4․3 Aligning the X-Ray Beam
Proper alignment of the X-ray beam is critical to avoid distortion and ensure accurate imaging․ Use the aiming device to guide the beam perpendicular to the dental film or sensor․ Adjust the beam’s angulation to match the tooth’s long axis, ensuring it is neither too steep nor too shallow․ This prevents elongation or foreshortening of the image, ensuring clear and diagnostically useful radiographs․
- Align the beam perpendicular to the sensor․
- Adjust angulation to match the tooth’s axis․
- Avoid excessive steepness or shallowness․
Step-by-Step Guide to Extraoral X-Ray Positioning
Extraoral X-ray positioning involves adjusting the machine, aligning the beam, and ensuring proper patient placement for clear imaging, focusing on panoramic and cephalometric techniques․
5․1 Panoramic X-Ray Positioning
Panoramic X-ray positioning involves placing the patient upright or seated, ensuring the midsagittal plane is centered․ The X-ray beam is angled to capture a wide view of the dental arches and surrounding structures․ Proper alignment minimizes distortion and ensures a comprehensive image for accurate diagnosis, while maintaining patient comfort and safety during the procedure for optimal results․
5․2 Cephalometric X-Ray Positioning
Cephalometric X-ray positioning requires precise head alignment․ The patient stands upright with the Frankfort horizontal plane parallel to the floor․ The chin rests on the positioning device, ensuring the midsagittal plane aligns with the X-ray beam․ The focal-to-midsagittal plane distance is set to capture lateral cephalometric projections․ Proper positioning minimizes distortion, providing accurate measurements for orthodontic and craniofacial assessments while maintaining patient comfort during the imaging process․
Common Mistakes in Dental X-Ray Positioning
Common errors include improper angulation, incorrect sensor placement, and patient movement, leading to distorted images․ Proper training and attention to detail help minimize these issues effectively․
6․1 Overlapping of Teeth
Overlapping of teeth in dental X-rays occurs when improper angulation or positioning causes teeth to obscure each other, leading to distorted images․ This can hide decay, fractures, or other abnormalities, making diagnosis challenging․ Proper alignment of the X-ray beam and sensor is crucial to avoid this issue, ensuring clear, diagnostic-quality radiographs for accurate patient care and treatment planning․
6․2 Incorrect Angulation
Incorrect angulation in dental X-rays can lead to elongation or foreshortening of teeth and surrounding structures, causing distortion․ This can obscure critical details, such as caries or fractures, and affect diagnosis․ Proper alignment of the X-ray beam relative to the dental arch is essential to ensure accurate representation of anatomy and avoid misinterpretation․ Using parallel or bisecting angle techniques helps achieve optimal results․
Patient Preparation for Dental X-Rays
Patient preparation involves ensuring comfort, removing jewelry, and adjusting clothing for unobstructed access․ Explaining the procedure and using protective gear like lead aprons ensures safety and compliance․
- Ensure the patient is comfortable and well-informed․
- Remove any items that may interfere with X-rays․
- Use protective gear to minimize radiation exposure․
7․1 Ensuring Patient Comfort
Ensuring patient comfort is vital for successful dental X-ray procedures․ Proper positioning prevents strain, while clear communication reduces anxiety․ Use supportive tools like headrests or cushions to maintain comfort․ Explaining each step helps patients relax, fostering a positive experience and cooperation during the process․
- Position the patient to avoid discomfort or strain․
- Communicate clearly to reduce anxiety and build trust․
- Use supportive tools to maintain a comfortable posture․
7․2 Explaining the Procedure
Explaining the procedure is essential for patient cooperation and reducing anxiety․ Describe each step clearly, emphasizing the importance of remaining still and the purpose of the X-ray․ Use simple language to ensure understanding, and address any concerns to build trust․ Demonstrating the process beforehand can also help patients feel more at ease․
- Describe each step clearly and concisely․
- Explain the importance of staying still and the purpose of the X-ray․
- Address patient concerns to build trust and reduce anxiety․
Radiation Safety in Dental X-Ray Positioning
Radiation safety is crucial in dental X-ray positioning to minimize exposure risks․ Using protective gear and following proper protocols ensures patient and staff safety effectively․
8․1 Minimizing Radiation Exposure
Minimizing radiation exposure is vital in dental radiography․ Techniques include using digital sensors, limiting beam size, and applying the ALARA principle․ Proper positioning reduces retakes and exposure, ensuring safety while maintaining image quality for accurate diagnoses and effective patient care;
8․2 Using Protective Gear
Protective gear is essential in dental radiography to safeguard patients and staff from radiation․ Lead aprons, thyroid collars, and gloves are standard, shielding vulnerable areas․ Digital sensors and high-speed films reduce exposure needs․ Proper use ensures safety, minimizing risks while maintaining image quality for accurate diagnoses and effective patient care․

Advanced Techniques in Dental X-Ray Positioning
Advanced techniques include digital radiography and cone-beam CT, offering enhanced imaging precision and reduced radiation exposure, improving diagnostic accuracy and patient outcomes․
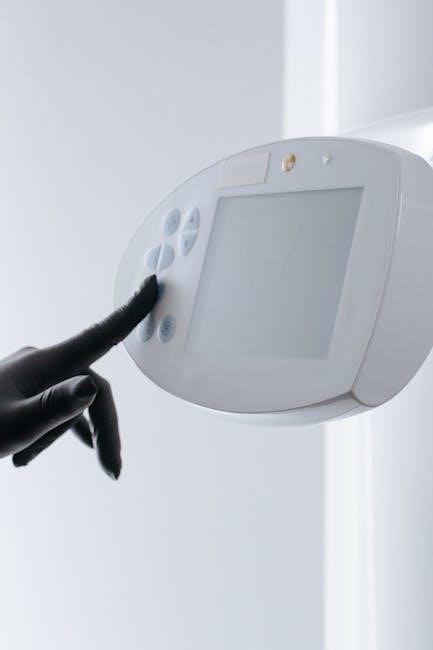
9․1 Using Digital Radiography
Digital radiography enhances dental imaging by providing high-resolution images with reduced radiation exposure․ It streamlines workflows, allowing immediate results and easy sharing․ Advanced software enables image enhancement, improving diagnostic accuracy․ Tools like the iM3 Complete X-Ray Positioning Kit simplify precise alignment, ensuring optimal outcomes․ Digital systems are environmentally friendly, reducing chemical use, and integrate seamlessly with modern dental practices for efficient patient care․
9․2 Cone-Beam CT (CBCT) Imaging
Cone-Beam CT (CBCT) imaging offers advanced 3D visualization, enhancing diagnosis and treatment planning․ It captures detailed anatomy, aiding in complex procedures like implant placement․ Proper positioning is vital for accurate imaging, utilizing guides to align the beam․ CBCT reduces distortion and provides better detail than traditional X-rays, improving diagnostic accuracy and patient outcomes while minimizing radiation exposure․
Troubleshooting Common Issues
Troubleshooting Common Issues in Dental X-Ray Positioning Addressing difficulties such as patient discomfort and misalignment․ Resolving technical problems like sensor placement errors and incorrect angulation ensures accurate imaging․
10․1 Dealing with Difficult Patients
Dealing with difficult patients requires clear communication, empathy, and patience․ Ensuring patient comfort and understanding can reduce anxiety․ Use visual aids to explain procedures, creating a relaxed environment․ Offer breaks if needed and maintain a calm demeanor to build trust, ensuring successful X-ray positioning and a positive experience for both the patient and practitioner․
10;2 Resolving Technical Problems
Resolving technical issues during X-ray positioning requires quick identification and troubleshooting․ Check sensor placement, alignment of the X-ray beam, and ensure proper equipment function․ Regular maintenance of tools like the iM3 kit can prevent malfunctions․ If issues persist, consult user manuals or contact technical support for assistance, ensuring minimal disruption to the procedure and patient care․
The evolution of dental X-ray positioning reflects a balance between traditional techniques and advanced technologies, enhancing diagnostic accuracy, patient safety, and effective treatment outcomes․ Staying informed about innovations ensures optimal care․
11․1 Summary of Key Points
Proper dental X-ray positioning ensures accurate imaging, minimizing errors and radiation exposure․ Key techniques include intraoral and extraoral methods, with tools like the iM3 kit enhancing precision․ Patient comfort and safety are prioritized through clear communication and protective gear․ Regular troubleshooting and adherence to radiation guidelines optimize results, making dental X-ray positioning a cornerstone of modern diagnostics and treatment planning․
11․2 The Future of Dental X-Ray Positioning
The future of dental X-ray positioning lies in advanced technologies like digital radiography and cone-beam CT (CBCT), offering enhanced imaging accuracy․ AI integration will streamline workflows, improving diagnostic precision․ Innovations in sensor design and real-time imaging will further reduce radiation exposure and improve patient outcomes, making dental X-ray positioning more efficient and patient-centric in the years to come․
Additional Resources
Explore recommended reading, online courses, and tutorials for advanced learning․ Utilize professional communities and forums for updates on the latest techniques and technologies in dental X-ray positioning․
12․1 Recommended Reading
For in-depth knowledge, explore textbooks like Dental Radiography: Principles and Techniques and Oral Radiology: Principles and Interpretation․ Online guides from ADA and dental journals offer practical insights․ Consider enrolling in certified courses for hands-on training and updated techniques․ These resources provide comprehensive understanding and practical applications of dental X-ray positioning, ensuring proficiency in modern radiographic practices․
12․2 Online Courses and Tutorials
Enroll in online courses on platforms like Coursera or Udemy for structured learning․ The iM3 X-Ray Positioning Kit tutorials on YouTube offer practical demonstrations․ Interactive modules and hands-on exercises provide skill enhancement․ Certifications from professional bodies like ADA or IDIA are also available․ These resources ensure updated techniques and best practices in dental radiography, catering to both beginners and experienced professionals․